TL;DR
A strong facilities vendor onboarding process verifies paperwork, trade coverage, service areas, contacts, rates, emergency rules, and performance expectations before any work order is dispatched. The best approach is a repeatable checklist inside a shared system, so facility managers reduce admin delays, protect budgets, and assign the right vendor faster.
A facilities vendor onboarding process can decide whether a leaking roof gets a qualified contractor in 20 minutes or turns into a messy email chain. For multi-site teams, the difference usually comes down to one question: is every vendor already verified, categorized, priced, and ready for dispatch? Leansite helps facilities teams centralize that work in one operating layer for vendors, work orders, and follow-up. More details are available at Leansite, and teams comparing software workflows can also review this guide to multi-location facilities management software.
Table of Contents
What is vendor onboarding for facilities?
Vendor onboarding: the structured process of approving a contractor or service provider before assigning maintenance work.
Vendor onboarding for facilities means collecting business, compliance, pricing, availability, and performance details from contractors before dispatch. In 2026, strong onboarding also means storing that information in a searchable system, not scattered across email, spreadsheets, and local site folders.
Facilities teams handle trades with very different risk profiles. A landscaping provider, fire-life-safety vendor, refrigeration contractor, locksmith, and electrical contractor should not pass through the same shallow approval step. Each needs clear scope, documents, contacts, rates, and escalation rules.
Key takeaway: Approved should mean job-ready, not just "known by someone at a site."
Core onboarding records to collect first
The first pass should capture the facts needed to assign work without another round of back-and-forth.
- Legal business name and DBA, if different
- W-9 or tax documentation for payment setup
- Trade categories, licenses, and certifications
- Insurance certificates and expiration dates
- Service areas by ZIP code, region, or site list
- Standard, after-hours, holiday, and emergency rates
- Primary, billing, dispatch, and escalation contacts
- Emergency availability and response windows
- Payment terms, invoice rules, and required work order fields
- Safety requirements, site access rules, and check-in procedures
This record becomes the source of truth for operations, finance, procurement, and local managers.
Why a structured onboarding process speeds up repairs
A structured onboarding process speeds up repairs because dispatchers can match each job to a pre-approved vendor with the right trade, coverage area, rate, and availability. It also reduces avoidable delays caused by missing insurance, unclear pricing, expired contacts, or vendors that cannot serve a specific location.
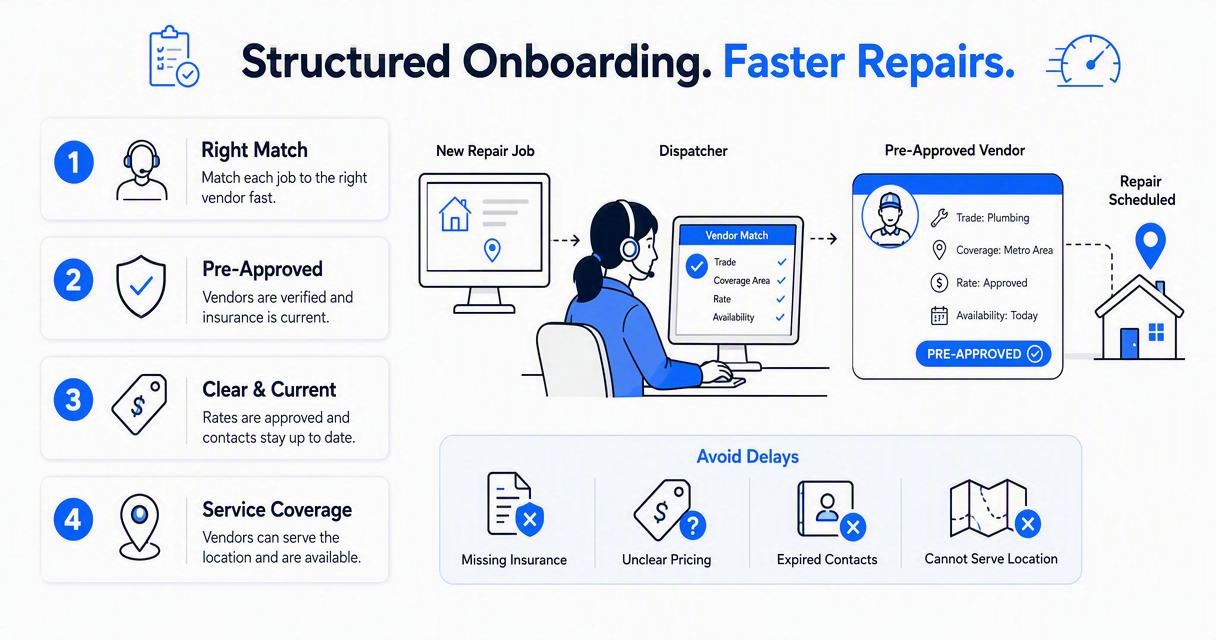
Reactive maintenance moves fast, but vendor approval often moves slowly. When teams wait until an asset fails to confirm insurance, rates, or service territory, the work order sits idle while the problem grows.
Good onboarding also improves spend control. Facility leaders can compare rate cards before dispatch, route work to preferred providers, and review vendor performance across locations. The value compounds in portfolios with restaurants, campuses, retail stores, clinics, or warehouses.
For restaurant operators with many locations, vendor coverage and emergency response rules can vary by market. The same operating logic applies in this guide to facilities management for restaurant chains.
Manual tracking vs. system-based onboarding
| Onboarding area | Manual spreadsheet or email | Centralized facilities system |
|---|---|---|
| Insurance tracking | Expiration dates are easy to miss | Expiration fields can be reviewed before dispatch |
| Service coverage | Stored in notes or local memory | Searchable by region, site, or ZIP code |
| Rate cards | Attached to old emails | Tied to vendor profile and work order rules |
| Emergency dispatch | Depends on who knows the vendor | Clear escalation contacts and availability |
| Performance review | Hard to compare across sites | Response, completion, and invoice patterns are visible |
The Leansite platform is designed for facilities teams that need this operating view across vendors, assets, tasks, and locations. For teams adding automation after onboarding, this related article explains vendor dispatch and predictive maintenance automation.
How to build a facilities vendor onboarding process
Build a facilities vendor onboarding process by standardizing intake, verifying documents, categorizing service capabilities, approving rates, assigning contacts, and testing dispatch readiness. The workflow should end with a vendor profile that operations can use immediately, with no hidden approvals left for the first live work order.
A practical process does not need to be complex. It needs to be consistent.
Seven-step onboarding workflow
- Define the need: Identify the trade, locations, service level, and expected job volume.
- Pre-screen the vendor: Confirm basic fit, coverage area, availability, and references.
- Collect documents: Request W-9, licenses, insurance certificates, safety forms, and payment details.
- Verify risk items: Review insurance limits, license status, expiration dates, and site access requirements.
- Approve commercial terms: Confirm rates, trip charges, emergency pricing, invoice rules, and payment terms.
- Build the dispatch profile: Add contacts, trade tags, coverage zones, response expectations, and escalation paths.
- Test readiness: Send a non-urgent work order or confirm dispatch instructions before the first urgent call.
"Plans are worthless, but planning is everything.", Dwight D. Eisenhower, The Eisenhower Presidential Library
The quote fits facilities work because the exact repair plan may change, but preparation keeps decisions fast. A vendor profile should make the next action obvious: call, dispatch, escalate, approve, or replace.
Campus and enterprise teams can apply the same workflow to improve work-order visibility across departments. A deeper look at that operating model appears in work order transparency for campus facilities.
What should be verified before a vendor gets dispatched?
A vendor should be verified for insurance, trade authority, service area, pricing, emergency availability, contacts, tax setup, invoice requirements, and performance expectations before dispatch. The goal is simple: no contractor should receive work until the team knows who is coming, what they can do, what they charge, and how performance will be measured.
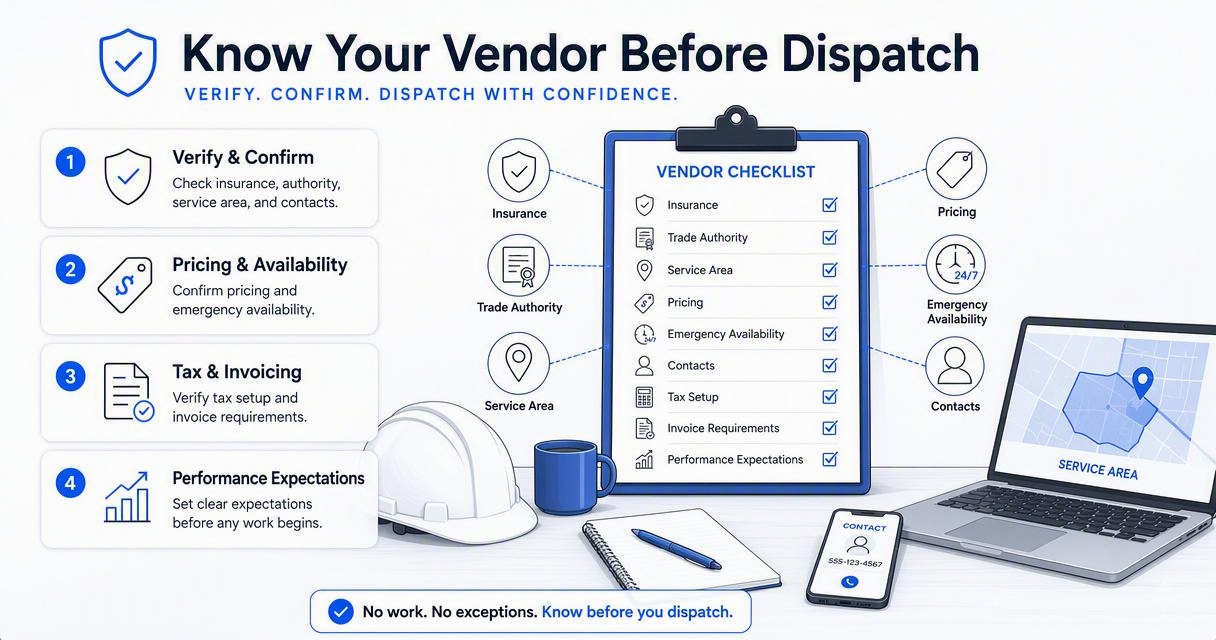
Facilities onboarding should separate "collected" from "approved." A certificate of insurance sitting in an inbox is not the same as a reviewed certificate with coverage limits, expiration dates, and correct entity names recorded.
Pre-dispatch approval checklist
- Insurance: General liability, workers' compensation, auto liability, umbrella coverage when required, and expiration dates.
- Trade coverage: Exact services offered, excluded work, license numbers, certifications, and subcontractor rules.
- Service area: Sites, regions, ZIP codes, mileage limits, travel charges, and blackout zones.
- Rates: Standard labor, overtime, after-hours, emergency, materials markup, trip fees, and minimum charges.
- Availability: Normal hours, emergency response windows, weekend support, holiday process, and backup contacts.
- Contacts: Dispatch, technician lead, account manager, billing, compliance, and executive escalation.
- Finance setup: W-9, remittance address, ACH details if used, invoice format, purchase order needs, and tax rules.
- Performance expectations: Response time, first-time fix goals, photo requirements, closeout notes, quote thresholds, and communication cadence.
The approval record should also define who can update vendor data. Finance may own tax files, facilities may own dispatch rules, and procurement may own contract terms.
How should performance expectations be managed after onboarding?
Performance expectations should be managed through clear service levels, work order data, invoice review, and scheduled vendor scorecards. Onboarding sets the standard, but ongoing measurement shows whether a contractor is still the right fit for each trade, site, and priority level.
Useful scorecards do not need to punish vendors. They should create a shared view of response quality, cost, communication, and closeout discipline.
Vendor scorecard fields that matter
| Scorecard field | Why it matters | Review cadence |
|---|---|---|
| Response time | Shows dispatch reliability for urgent work | Monthly |
| Completion time | Highlights delays by trade or region | Monthly |
| First-time fix notes | Reveals quality and parts planning | Quarterly |
| Invoice accuracy | Protects budgets and payment speed | Monthly |
| Communication quality | Reduces status calls and site confusion | Quarterly |
| Safety or access issues | Protects people, assets, and compliance | As needed |
Performance data gets more valuable after the first year because patterns become easier to spot across vendors, locations, and asset types. That concept is covered in more detail in why year two is when facilities data proves its value.
Artificial intelligence is also becoming more useful here. In 2026, AI can help summarize work order history, flag missing vendor data, and suggest dispatch matches from past outcomes. For a broader view, see this guide to AI facility management software.
Conclusion
A strong facilities vendor onboarding process turns contractor approval into a repeatable operating system: collect documents, verify coverage, approve rates, map service areas, set response rules, and measure performance after the first job. Multi-location teams gain the most when that information stays connected to work orders and vendor history.
Facilities leaders ready to make vendor profiles dispatch-ready can evaluate Leansite, standardize the checklist, and visit getleansite.com to see how vendor coordination fits into a broader facilities workflow.